Adstra

Tuesday, November 5, 2024

Sophistication in Simplicity The Rise of Minimalist Modern Kitchen Cabinets

Introduction

The modern home's heart, the kitchen, continues to evolve as a blend of aesthetics and functionality. In recent years, a distinct shift towards minimalist design in kitchen cabinetry has emerged as a dominant trend. This article explores the essence of modern kitchen cabinets and their increasing popularity in 2024, emphasizing how simplicity in design can bring both sophistication and efficiency to the modern kitchen.

The Essence of Minimalism in Kitchen Design

Minimalism is more than just a design trend; it's a philosophy that emphasizes the beauty in simplicity, functionality, and clutter-free living. In kitchen design, minimalism involves streamlined shapes, a cohesive color palette, and a clear focus on maximizing space without sacrificing style. This approach not only enhances the kitchen's visual appeal but also improves its functional efficiency.

Key Features of Minimalist Kitchen Cabinetry

  Simplified Color Palettes

      Neutral colors like whites, greys, and muted tones dominate modern kitchen cabinets designs, creating a clean and calming atmosphere. These colors reflect light better, which helps in making the space appear larger and more open.

  Clean Lines and Seamless Surfaces

      Minimalist cabinetry is characterized by smooth, flat surfaces, and handle-less doors. Such features contribute to a seamless and unobtrusive design, enhancing the kitchen's overall sleek and sophisticated look.

  Functional Elegance

      The minimalist approach is not only about appearance but also about functionality. Integrating innovative storage solutions such as built-in organizers and hidden appliances maintains the clean lines while providing high functionality.

Materials and Finishes in Minimalist Kitchen Design

In 2024, the choice of materials and finishes in modern kitchen cabinets reflects a commitment to sustainability and aesthetics. High-gloss finishes are popular for their ability to bring light and depth into the kitchen, while matte textures provide a contemporary look that resists fingerprints and smudges, making them practical for frequent use. Natural materials like wood with visible grain patterns offer warmth and texture, balancing the coolness of metallic and glass accents.

Technological Integration in Modern Kitchen Cabinets

The modern kitchen cabinets are not only a place for cooking but also a hub of innovation and technology. Minimalist kitchen cabinets in 2024 are increasingly incorporating smart technologies:

  Touch-sensitive surfaces allow for the cabinets and drawers to be opened with a simple touch, which is particularly useful for maintaining clean lines and smooth surfaces.

  Integrated appliances such as dishwashers and refrigerators maintain the minimalist aesthetic while adding to the kitchen's functionality.

Technological enhancements in minimalist kitchen design not only contribute to a sleek appearance but also improve the user's interaction with their space, making everyday tasks simpler and more enjoyable.

Benefits of Adopting Minimalist Kitchen Cabinetry

  Enhanced Spatial Perception

      Minimalist designs are key to making a kitchen appear larger and more inviting. By using uniform colors and simple lines, these cabinets help to create an illusion of more space, making them ideal for both small and large kitchens.

  Timeless Appeal

      The minimalist approach to modern kitchen cabinets is timeless, moving away from trendy designs that quickly go out of style. This ensures that your kitchen remains appealing not just today but for years to come.

  Ease of Maintenance

      The simplicity of minimalist kitchen cabinets makes them easier to clean and maintain. Without intricate designs or excessive hardware, keeping your kitchen pristine becomes less of a chore.

Incorporating Minimalism into Your Kitchen

For homeowners intrigued by modern kitchen cabinets design, transforming your kitchen need not be a daunting task. Here are practical tips to adopt this style:

  Choose the Right Colors and Materials: Start with a neutral color palette and choose materials that reflect light to enhance the spacious feel of your kitchen.

      Opt for Sleek, Integrated Appliances: Maintain the minimalist look by selecting appliances that can be fully integrated into your cabinetry.

  Focus on Functional Storage Solutions: Utilize innovative storage options that hide clutter and maintain the clean lines of minimalism.

Case Studies and Examples

To illustrate the transformative power of modern kitchen cabinets, consider these real-world examples:
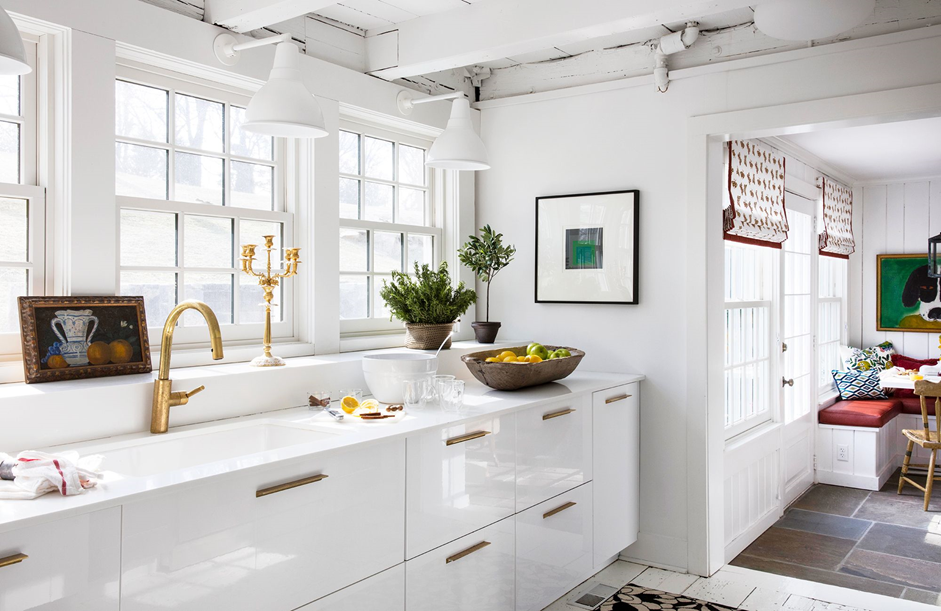
  Case Study 1: A small apartment kitchen overhauled with white, high-gloss cabinets that reflect light beautifully, making the space feel twice as large.
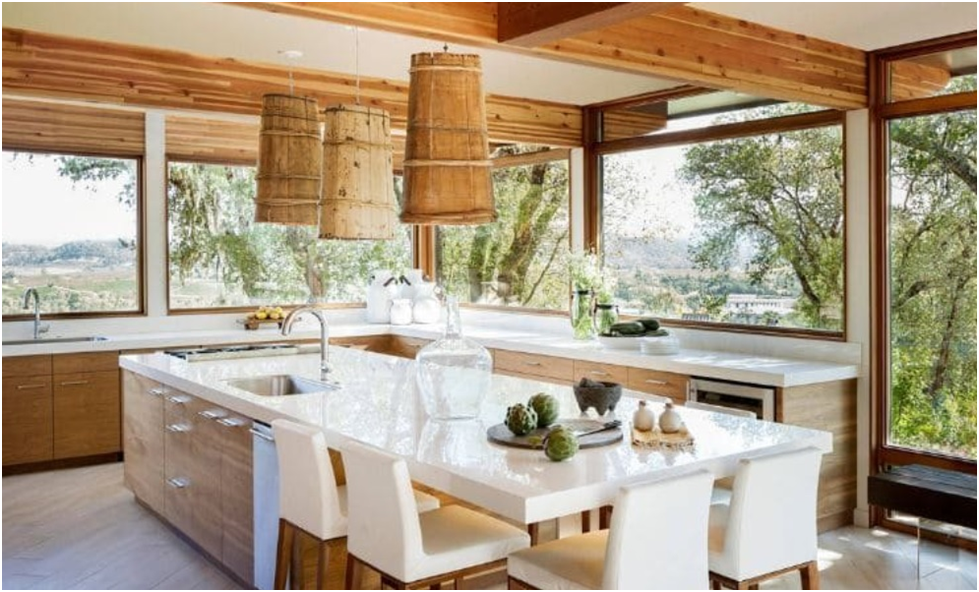
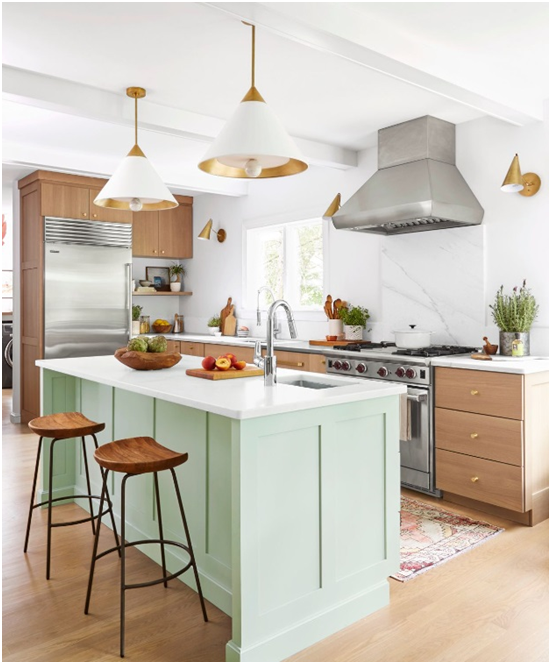
  Case Study 2: A family kitchen remodelled with natural wood cabinets and hidden storage options, creating a warm yet functional space.

These examples demonstrate how minimalist principles can be applied to different kitchen sizes and family needs, providing both aesthetic appeal and practical solutions.

Conclusion

The rise of minimalist kitchen cabinetry in 2024 is more than just a trend; it's a reflection of the changing preferences towards more sustainable, functional, and aesthetically pleasing kitchen designs. As we embrace the sophistication of simplicity, these kitchens not only cater to our contemporary needs but also enhance the quality of our living spaces.

Call to Action

Are you ready to transform your kitchen with modern kitchen cabinets? Consult with a designer to explore the possibilities that minimalist kitchens offer. For more inspiration and advice on getting started with your kitchen renovation, visit our gallery or contact our design team.

This article has laid out a clear path to understanding and embracing minimalist kitchen cabinetry in 2024, ensuring your kitchen is both timeless and trendy.


Friday, November 1, 2024

Introduction to Coriolis Meter Maintenance

Coriolis meters are widely used in various industries for measuring the mass flow rate of fluids. To ensure optimal performance and accuracy, regular maintenance is essential. In this article, we will explore the importance of Coriolis meter maintenance, common issues that can affect performance, and provide tips for maintaining optimal performance.


Why Maintenance is Important


Regular maintenance is crucial for Coriolis meters to ensure optimal performance and accuracy. Neglecting maintenance can lead to a range of issues, including:


Inaccurate Measurements: Failure to maintain the meter can result in inaccurate measurements, which can have serious consequences in industries such as oil and gas, chemical processing, and pharmaceuticals.

Reduced Lifespan: Poor maintenance can reduce the lifespan of the meter, leading to costly repairs or replacement.

Downtime: Neglecting maintenance can result in unexpected downtime, which can have significant economic and operational impacts.

Common Issues that Can Affect Performance


Several common issues can affect the performance of Coriolis meters, including:


Scale Buildup: Scale buildup can occur when minerals in the fluid precipitate out and form a hard, crusty layer on the meter's surface. This can affect the meter's accuracy and reduce its lifespan.

Corrosion: Corrosion can occur when the meter is exposed to aggressive fluids or environments. This can weaken the meter's structure and affect its performance.

Vibration: Excessive vibration can affect the meter's accuracy and reduce its lifespan.

Tips for Maintaining Optimal Performance


To maintain optimal performance and accuracy, follow these tips:


Regular Cleaning: Regularly clean the meter to prevent scale buildup and corrosion.

Inspection: Regularly inspect the meter for signs of wear and tear, corrosion, or other damage.

Calibration: Regularly calibrate the meter to ensure accuracy and reliability.

Vibration Reduction: Take steps to reduce vibration, such as using vibration-reducing mounts or installing the meter in a location that minimizes vibration.

Best Practices for Cleaning and Inspection


Cleaning and inspection are critical components of Coriolis meter maintenance. Here are some best practices to follow:


Use the Right Cleaning Solution: Use a cleaning solution that is compatible with the meter's materials and the fluid being measured.

Avoid Harsh Chemicals: Avoid using harsh chemicals or abrasive cleaners, which can damage the meter's surface.

Inspect the Meter Regularly: Regularly inspect the meter for signs of wear and tear, corrosion, or other damage.

Common Mistakes to Avoid


When maintaining coriolis meters, it's essential to avoid common mistakes that can affect performance and accuracy. Here are some mistakes to avoid:


Neglecting Regular Maintenance: Neglecting regular maintenance can lead to a range of issues, including inaccurate measurements and reduced lifespan.

Using the Wrong Cleaning Solution: Using the wrong cleaning solution can damage the meter's surface and affect its performance.

Ignoring Signs of Wear and Tear: Ignoring signs of wear and tear can lead to costly repairs or replacement.

Conclusion


In conclusion, Coriolis meter maintenance is essential for ensuring optimal performance and accuracy. By following the tips and best practices outlined in this article, you can help prevent common issues, reduce downtime, and extend the lifespan of your Coriolis meter. Remember to regularly clean and inspect the meter, calibrate it regularly, and take steps to reduce vibration. By doing so, you can ensure that your Coriolis meter continues to operate accurately and reliably.


Monday, October 28, 2024

DIY Cabinets Build Your Dream Cabinets and Save Money


Building your own cabinets might seem like an intimidating project, but with the right steps and guidance, you can create custom cabinets that perfectly fit your space and style. Not only can DIY cabinets save you money, but they also offer a rewarding hands-on experience. Let’s dive into the step-by-step process of creating beautiful, sturdy cabinets that look just like those from high-end stores!

How to Build Your Own DIY Cabinets

1. Planning and Preparation: Start With a Solid Foundation

The first step to building DIY cabinets is thorough planning. Measure the space where your cabinets will go, and remember to account for any baseboard or molding that might affect the fit. Accurate measurements are essential to ensure your cabinets align perfectly with the walls and floor​.

Choose the right materials for your project. Plywood is a popular choice due to its strength and ease of use. You’ll also need basic tools like a drill, saw, clamps, and screws, as well as safety gear. Since you’re likely using power tools, don’t skip out on goggles and gloves—they’re essential for keeping you safe while you work​.

2. Building the Cabinet Frame:

Now it’s time to cut the plywood and assemble the cabinet frame. For best results, use a table saw or circular saw to make precise cuts on the side panels, top, and bottom pieces. Mark your measurements on the plywood before cutting, and check for accuracy as you go. It’s wise to double-check your cuts to ensure they’re square. Even a small error can lead to a wonky cabinet that’s tough to align during installation​.

For assembly, pocket hole joinery is a favorite among DIY enthusiasts. It’s easy, secure, and allows you to hide screws, leaving a smooth finish. Glue and screw the pieces together, using clamps to hold them in place until the glue dries. This will create a sturdy frame that can handle the weight of shelves and anything you plan to store​.

Adding Toe Kicks

Toe kicks are those recessed areas at the bottom of kitchen cabinets that allow you to stand closer to the counter. They make a big difference in comfort, especially when you’re working for long periods. Cut notches into the bottom front corners of the side panels to add toe kicks. This simple addition enhances the usability and professional appearance of your cabinets​.

3. Installing Shelves and Dividers:

With the frame ready, it’s time to add shelves and dividers. Fixed shelves are easiest to install—just glue and screw them into place inside the cabinet. If you want adjustable shelving, consider using a shelf pin jig. This tool allows you to drill evenly spaced holes on the side panels, providing flexibility for moving shelves up or down later​.

For extra functionality, you can incorporate pullout shelves or drawers. These are especially useful in deep cabinets, where it can be hard to reach items at the back. Pullout shelves add convenience and maximize storage by bringing everything within easy reach​.

4. Attaching the Back and Face Frame:

Cut a piece of plywood for the cabinet back, ensuring it fits snugly between the sides. Glue and nail it in place to stabilize the cabinet. This back panel prevents the cabinet from twisting and adds durability.

Next, you’ll want to attach a face frame if you prefer a traditional look. The face frame covers the edges of the plywood and creates a more polished appearance. Cut pieces of wood for the face frame, then use pocket screws and glue to attach them to the front of the cabinet. This step not only improves aesthetics but also reinforces the structure​.

5. Finishing Touches:

It’s time for the details that make your cabinet look professional. Start with edge banding, a simple technique for covering the exposed edges of plywood. Iron-on edge banding is widely available and easy to apply, giving your cabinets a clean, finished look.

After that, sand the entire cabinet to smooth any rough spots and prepare it for finishing. Depending on your design preference, you can paint or stain the wood. Paint offers a sleek, modern look, while stain highlights the natural grain and adds warmth. Apply multiple coats, allowing ample drying time between each, to achieve a durable, professional finish​.

6. Installing Hardware:

Hardware is the icing on the cake. Choose handles, knobs, and hinges that complement your overall design. Installing the hardware can be surprisingly satisfying; it’s the final step that brings your cabinets to life. Use a drill to attach the handles and hinges, ensuring they are aligned and secure​.

Conclusion:

Creating your own DIY cabinets is an incredible way to personalize your space while saving money. This project requires some time and patience, but with a bit of planning and effort, you’ll have cabinets that fit your exact specifications. Not only will they be functional, but they’ll also add a unique, personal touch to your home.

Building cabinets might seem challenging, but with these steps, you’re well-equipped to tackle the task. Plus, once you see the final result, you’ll know it was worth every minute! So gather your tools, get started, and enjoy the satisfaction of a job well done​.


RTA Kitchen Cabinets Affordable Style and Functionality for Your Home

Renovating a kitchen is no small task, and one of the biggest decisions you’ll make involves your cabinets. But what if there was a way to achieve a high-end look without the hefty price tag or the long wait? Enter RTA (Ready-to-Assemble) kitchen cabinets—a solution that’s both affordable and easy to install, making it a favorite among DIY enthusiasts and budget-conscious homeowners alike.

What are RTA Kitchen Cabinets?

RTA kitchen cabinets are flat-packed units that arrive at your door, ready for you to assemble. Unlike traditional cabinets, which come fully built and often require professional installation, RTA cabinets allow you to take control of the process, saving you money and giving you the flexibility to customize your kitchen. They’re made from the same materials as pre-assembled cabinets, such as particleboard, MDF, or even solid wood, but they’re designed for easy assembly and installation.

Why Choose RTA Kitchen Cabinets?

1. Significant Cost Savings

The most compelling reason to consider RTA cabinets is the cost. Because these cabinets are flat-packed, manufacturers save on labor and shipping expenses, and those savings are passed on to you. You could save up to 50% compared to custom cabinets, and even more when factoring in the savings on installation costs. For a standard 10-by-10 kitchen, you’re looking at several thousand dollars in savings—money that can be invested elsewhere in your renovation.

2. DIY-Friendly Assembly

If you’re handy with tools and enjoy tackling projects yourself, you’ll love RTA cabinets. Most kits come with all the necessary components, including screws and cam-lock hardware. The cabinets are pre-cut and drilled, so all you need is a screwdriver and some patience. Many manufacturers even provide video tutorials to guide you through the assembly process. So, while it might seem daunting at first, assembling RTA cabinets is typically straightforward and manageable with the right resources.

3. Customization Options Galore

With RTA cabinets, you don’t have to compromise on style. These cabinets come in a variety of finishes, materials, and door styles, so you can create a look that matches your vision. Whether you’re drawn to the sleek, modern vibe of frameless cabinets or prefer the classic appeal of a face-framed style, RTA options are available in abundance. Plus, you can mix and match features like soft-close hinges and dovetail drawer joints to create a kitchen that’s as functional as it is beautiful.

Potential Drawbacks to Consider

1. Time and Effort Required

One thing to keep in mind is that RTA cabinets require assembly. While the process is DIY-friendly, it does take time. For example, it may take you anywhere from 15 to 30 minutes to assemble a single cabinet, and more if you’re handling a larger kitchen. So, while you’ll save on labor costs, you’ll need to be prepared to put in some effort.

2. Quality Variability

Not all RTA cabinets are created equal, and there can be significant differences in quality between brands. If you’re looking for durability, avoid cheaper options that use particleboard for the cabinet boxes, as they may not stand the test of time. Instead, consider investing in plywood or solid wood options that offer greater durability. Look for features like solid wood drawer fronts and full-extension drawer glides to ensure you’re getting a high-quality product.

3. Limited Design Assistance

One potential drawback is the lack of design support. While some RTA retailers offer design services, it’s not as comprehensive as what you’d get with custom cabinets. If you’re planning a complex layout, you might need to hire a professional designer or use online tools to ensure everything fits perfectly. But for simple kitchen layouts, most homeowners find the process straightforward enough to handle on their own.

How to Choose the Right RTA Cabinets

When it comes to selecting the perfect RTA cabinets for your kitchen, you’ll want to consider a few key factors:

1. Material and Construction Quality

The material and construction of your cabinets will determine how long they last. Solid wood and plywood are more durable than particleboard, which is often found in lower-end models. If you’re aiming for quality, look for cabinets with dovetail drawer joints and soft-close hinges. These features are not only functional but also add a touch of luxury to your kitchen.

2. Style Choices

RTA cabinets come in various styles to suit different tastes. For a modern look, consider frameless cabinets with a full overlay, which maximizes storage space and gives a sleek appearance. If you prefer a traditional look, a face-framed style with a partial overlay might be more to your liking. In terms of colors and finishes, white shaker cabinets are a popular choice for their versatility and timeless appeal.

3. Reputable Vendors

Lastly, not all RTA cabinets are equal, and where you buy them matters. Look for reputable retailers that offer customer support and have good reviews. Online reviews are a great way to gauge the quality of the cabinets and the customer service provided by the manufacturer. Some retailers offer samples, so you can check the quality before making a big purchase.

Assembly Tips for RTA Cabinets

While assembling your cabinets might seem overwhelming, there are ways to make the process smoother:

      Organize Your Workspace: Before you start, make sure you have a clean, organized area to work in. Lay out all the pieces and hardware, and double-check that you have everything you need.

      Follow the Instructions: Take your time reading the instructions, and don’t hesitate to watch video tutorials if they’re available. Many manufacturers provide step-by-step guides that make the process easier to follow.

      Use the Right Tools: A screwdriver is usually all you need, but it helps to have a rubber mallet on hand for gently tapping pieces into place. If you’re working on a large project, consider using a power drill to save time.

Conclusion

Ready-to-assemble kitchen cabinets offer an excellent way to renovate your kitchen on a budget without sacrificing style or quality. With a bit of effort and patience, you can achieve a custom look that fits your space and your lifestyle. So, if you’re up for a DIY challenge and want to make your kitchen dreams a reality, RTA cabinets could be the perfect solution.


Featured Post

Login DELUNA4D Securely and Start Winning Today!

In the world of online togel, particularly with games like Toto Macau, having a reliable and secure platform is essential for a seamless gam...

Popular Posts